Oreo Scones
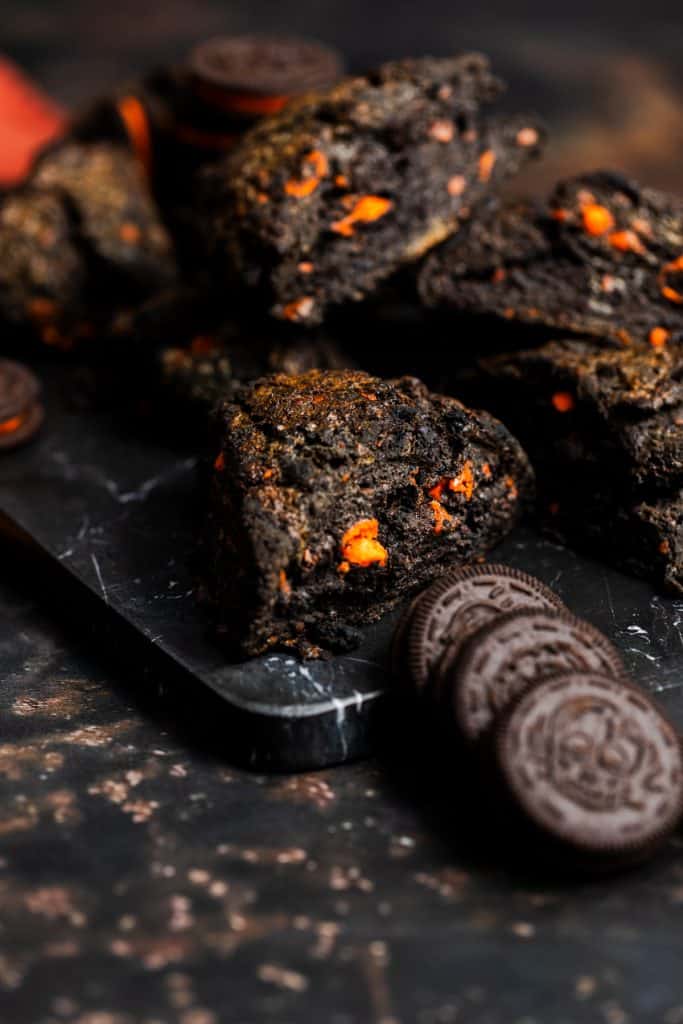
Oreo Scones made with black cocoa become a rich chocolatey treat that can be enjoyed for a decadent breakfast or a delicious dessert.
These are my Halloween scones, but also just delicious chocolate Oreo scones that can be enjoyed at any time. Because they use black cocoa, they come out a dark grayish black that can make them spooky looking and perfect for the holiday.
I developed a cookies and cream scone recipe about 6 years ago that I loved but didn’t think they were quite right. I never shared them on the blog (only photos on socials) but always had them in the back of my mind. So these Oreo scones, are a reincarnation of them, finally making it’s way to light.
Baking Notes & Tips
If you haven’t made scones before, they are relatively simple but knowing the process helps tremendously. I’d recommend hopping over to my Best Vanilla Cream Scones post which has a ton of tricks and tips in the process to get a fantastic turnout.
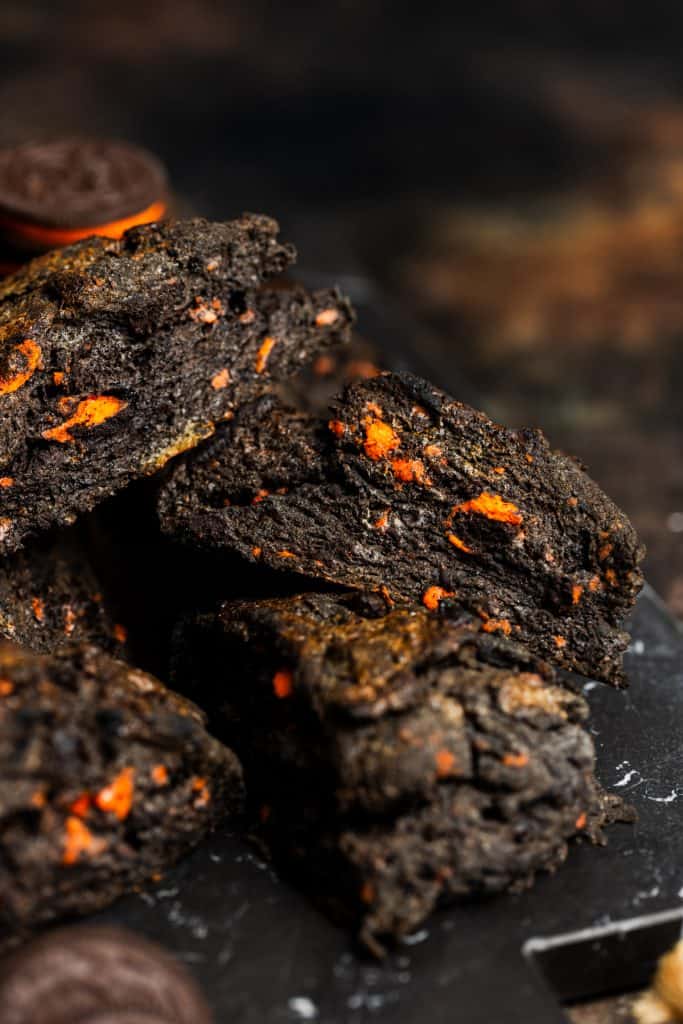
To make these spooky and Halloween scones, along with the black cocoa I used holiday Oreos that had orange filling. You can use any Oreo or sandwich cookie you’d like though. Changing the flavor to something like a Java chip Oreo or peanut butter would pair nicely.
I did not make any sort of drizzle for the tops of these, however my old recipe had a white chocolate glaze which I know would taste awesome on these as well. You could also just mix some powdered sugar, milk and vanilla and have a sweet icing.
Oreo Scones Key Ingredients
- Black Cocoa – Black cocoa is a special super dark cocoa that they use to make cookies like Oreos. It’s a dark chocolate but without the bitterness. I have a ton of recipes that use it, if you decide to add it to your baking pantry and want other things to use it with. That being said, you can sub out Dutch process cocoa – but it WILL change the flavor a bit.
- Oreos – As I said above, I used Halloween Oreos but whatever kind of sandwich cookie you’d like will work.
- Heavy Cream – When making scones, you want to use a good heavy cream. Heavy cream and butter do a lot of heavy lifting in the flavor and texture department. If you have access to a local dairy heavy cream it will help your scones taste amazingly decadent.

Ingredients
- 113 g (½ cup) Unsalted butter cold
- 280 g (2⅓ cups) AP flour
- 50 g (¼ cup) Granulated sugar
- 2½ tsp Baking powder
- ¼ tsp Baking soda
- 1 tsp Salt
- 20 g (4 tbsp) Black cocoa
- 100 g Oreos crushed
- 1 tsp Vanilla
- 1 large Egg cold, beaten
- 180 g (¾ cup) Heavy cream cold
- 1 tbsp Heavy cream for brushing
Instructions
- Put your butter in the freezer for about 20 minutes113 g Unsalted butter
- Line a baking sheet with parchment or silicone mat and set aside
- Mix together your dry ingredients: flour, sugar, salt, cocoa powder, baking powder, and baking soda and mix with a fork.280 g AP flour | 50 g Granulated sugar | 2½ tsp Baking powder | ¼ tsp Baking soda | 1 tsp Salt | 20 g Black cocoa
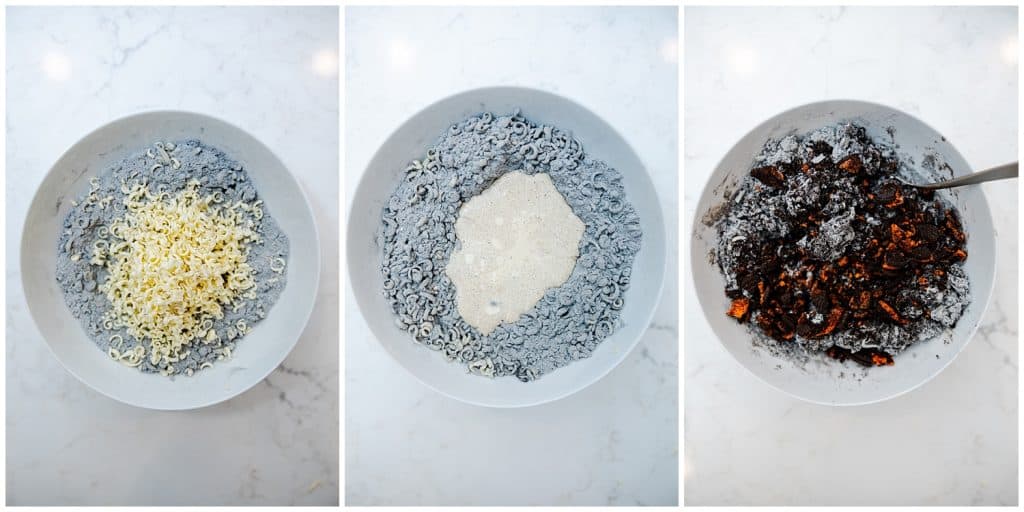
- Take your semi-frozen butter out of the freezer, unwrap and drop into your dry ingredients. Cover the sides lightly, then grate it over your flour mix. Fluffing it in to the flour after grating.
- Make a well in the center of your ingredients and pour in your cream, vanilla, and beaten egg.1 tsp Vanilla | 1 large Egg | 180 g Heavy cream
- Bring in the sides of the well into the center, forming a rough and shaggy dough.
- Pour in your oreos and mix them throughout the dough100 g Oreos
- Try to handle the dough as little as possible, while still bringing into something cohesive. When you have most of the dough forming, you will probably have a little bit of loose flour at the bottom of the bowl. Take that and put it on top of the dough and fold the dough over on itself 2-3 times.
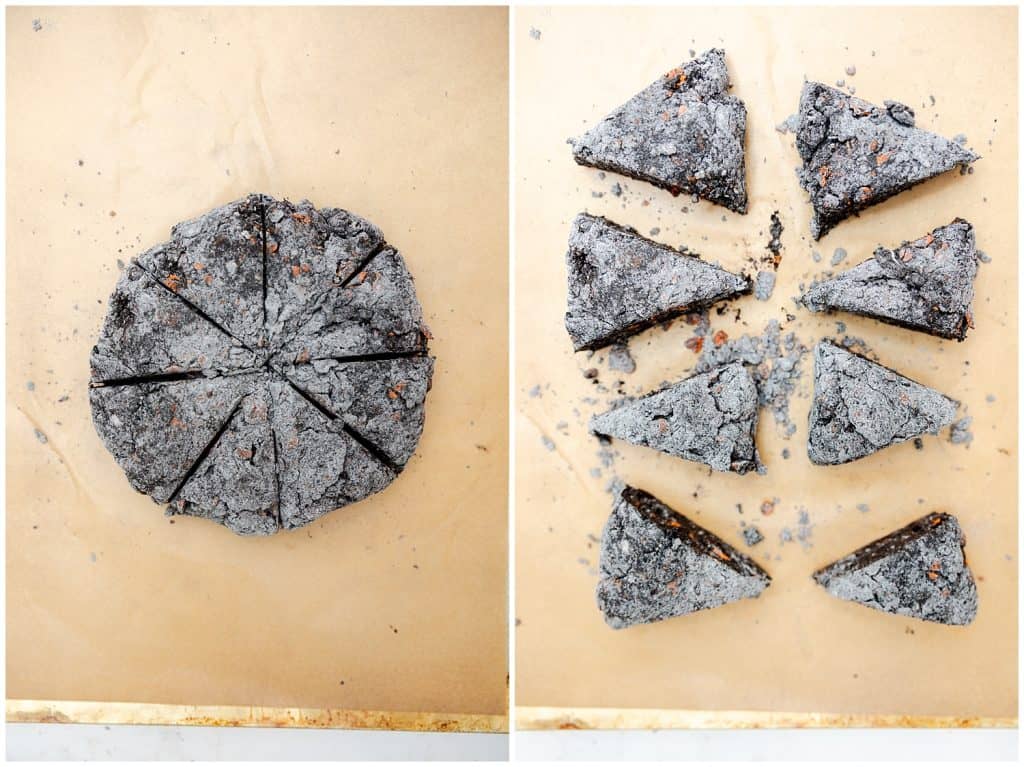
- Take your dough and place it on your parchment or silicone. Press it out into about a 1-1½ inch thick disc or square.
- Using a sharp knife or bench scraper, cut your dough into 8 wedges or 9 squares. Make sure to cut straight down and not use a sawing motion.
- Arrange your scones on the pan with 1-2 inches between them, and then place your baking tray in the freezer.
- Preheat your oven to 425°F
- When your oven is ready and your scones have been in the freezer for 15-20 minutes, take them out and brush with heavy cream. Place them in the oven on the center rack. As soon as they are in, reduce the temperature to 375°F.1 tbsp Heavy cream
- Bake for about 20-25 minutes, scones will be lightly browned, but due to the color this might be difficult to tell. They should also look dry and smell fragrant.
- Remove scones from oven and place on a wire rack to cool.
- Store scones in an airtight container for up to 4 days. Reheat in the oven or air fryer, wrapped in tin foil for about 8 minutes at 350. Enjoy!