
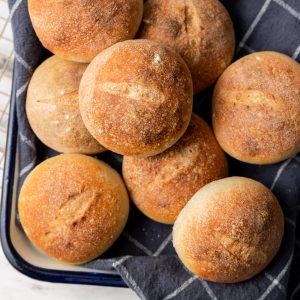
Crusty Dinner Rolls
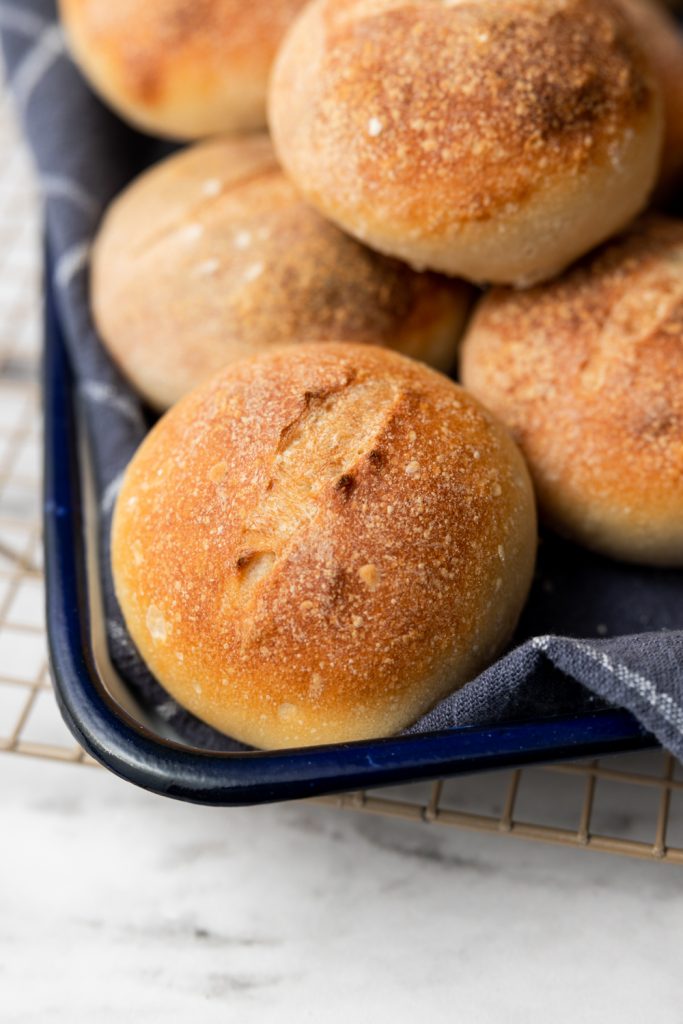
These crusty dinner rolls are a classic simple dinner roll with a crisp crust giving you that classic crackle of bread when you bite in.
Rarely is “crusty” a word you want associated with your food, but occasionally it happens. Crusty dinner rolls or a crusty baguette? Yes please. While I LOVE a good soft doughy bread (I’m looking at you Super Soft Milk Bread Buns and Sweet Potato Rolls) there’s something uniquely satisfying about hearing that crispy crunch when you tear or bite into bread like this.
These crusty dinner rolls are incredibly simple to make with minimal ingredients: flour, salt, yeast, sugar and water. No special ingredients or tools required.
Baking Notes & Tips
The key to getting the crusty exterior is steam. Misting the bread with water from a spray bottle right before putting them in the oven, and/or having some form of water in the oven while they bake. I find it easiest to place a cast iron pan on a rack set at the lowest level while the oven preheats. Then when you place your rolls in to bake, dump a cup (not the measuring unit, just any old cup) of ice into the cast iron. The ice will melt and create a lot of steam, helping with the crust.
Keep in mind that after baked and stored in some form of airtight container, the exterior will soften. You can store them in a paper bag to help prevent that but the bread will go stale and dry out MUCH more quickly. You can always pop them back in a hot oven (I would mist them with water before you do) for a few minutes the next to day to help crisp up the crust again.

Crusty Dinner Rolls Key Ingredients
- Water – One of the great things about these crusty dinner rolls is the simple ingredient list: just five total. The liquid pulling this all together is water. However, water is used in the dough, misted on the bread before baking and in the oven for creating extra steam to create that crust.
- Bread Flour – Bread flour is almost always what I recommend when baking bread as it gives better lift, structure and chew. All purpose can be substituted but the texture will be a little bit different.
- Salt – Simple salt is the main thing adding flavor to this bread. Sometimes it’s shocking how much heavy lifting salt can do.
Ingredients
- 480 g Bread flour 4 cups
- 12 g Sea salt 2 tsp
- 7 g Instant yeast 2¼ tsp
- 4 g Granulated sugar 1 tsp
- 340 g Water 1½ cups, warm
Instructions
- In the bowl of your stand mixer with dough hook attached, add flour, salt, yeast, sugar and water into the bowl and mix on low.480 g Bread flour | 12 g Sea salt | 7 g Instant yeast | 4 g Granulated sugar | 340 g Water
- Knead on low until the dough becomes stretchy and smooth, 10-20 minutes.
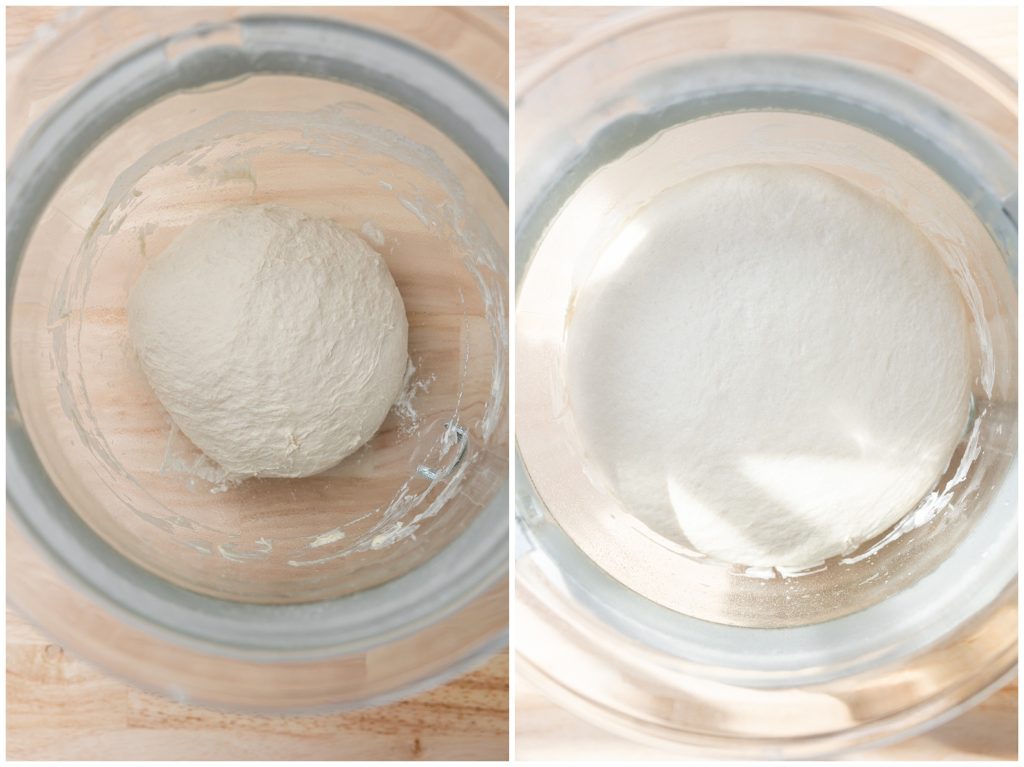
- Remove the dough from the bowl and shape into a ball. It will be sticky but shouldn't be unmanageable.
- Lightly grease your bowl and add the dough back into it. Cover and proof in a warm spot for 1-2 hours or until the dough has doubled in size.
- After the dough has doubled in size, punch it down and transfer it to your work space.
- Line a sheet pan and lightly dust it with flour.
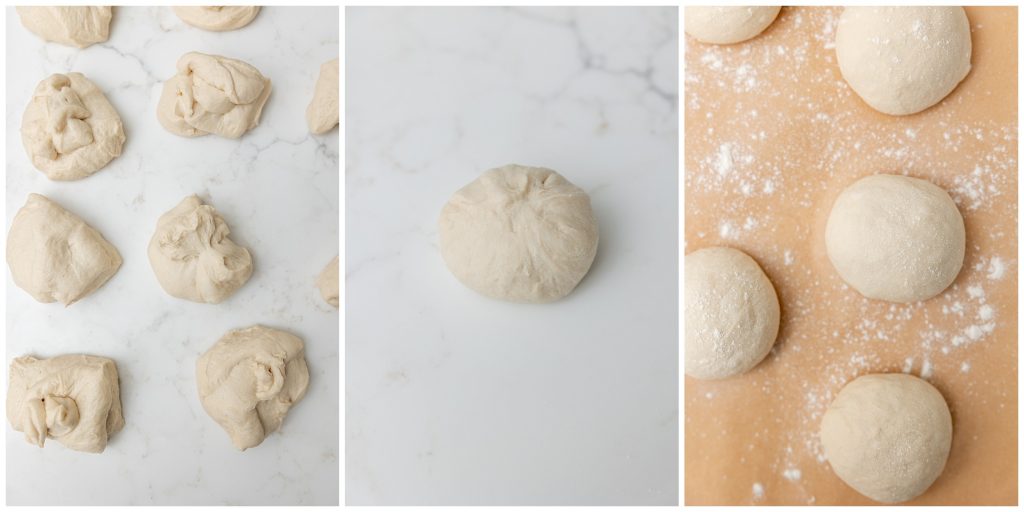
- Divide the dough into 8-10 equal size portions. If you want the rolls to be exactly even, weigh the dough and figure out how much each should weigh. For me, making 10 rolls this was about 80g each. If you don't care if they are the same size eyeballing it is completely fine.
- Cover your divided dough while you shape each portion.
- Take each portion of dough into the palm of your hand and fold the edges in towards the center, pinching them together. Keep doing this until you have a round ball shape.
- Place the dough seam side down onto the work space. Cup your hand over the dough and move the dough in a circular motion to create tension.
- Place the dough ball onto the prepared baking sheet and repeat with all the remaining pieces.
- Lightly sprinkle the tops of your rolls with flour.
- Cover your sheet pan with a tea towel or proofing cover and allow your rolls to proof for another 30-60 minutes or until they have puffed up.
- While your dough is proofing, preheat your oven to 450°F.
- When your oven is preheated and your rolls have finished their second rise, first make small slits about ¼ inch deep across the tops with a bread lame, razor blade or a sharp knife. Then mist the tops with water from a spray bottle right before placing them in the oven.
- Bake your rolls on the center rack of your oven for 15-20 minutes. The rolls should be a nice golden brown and sound hollow when the underside is tapped.
- Remove from the oven and transfer your rolls to a wire cooling rack. Allow bread to cool for at least 15-20 minutes before consuming. Store in an airtight container for up to 3 days. Enjoy!


Trying exactly your recipe today. It’s proofing now. Thanks a bunch!
Thanks John! I hope they turn out perfectly, happy baking! 🙂
Turned out perfectly. I used the cast iron pan method for the steam. I might skip the dusting of the tops next time around. 10/10 will bake again!
I’m so happy to hear this!