Simple Ciabatta Bread

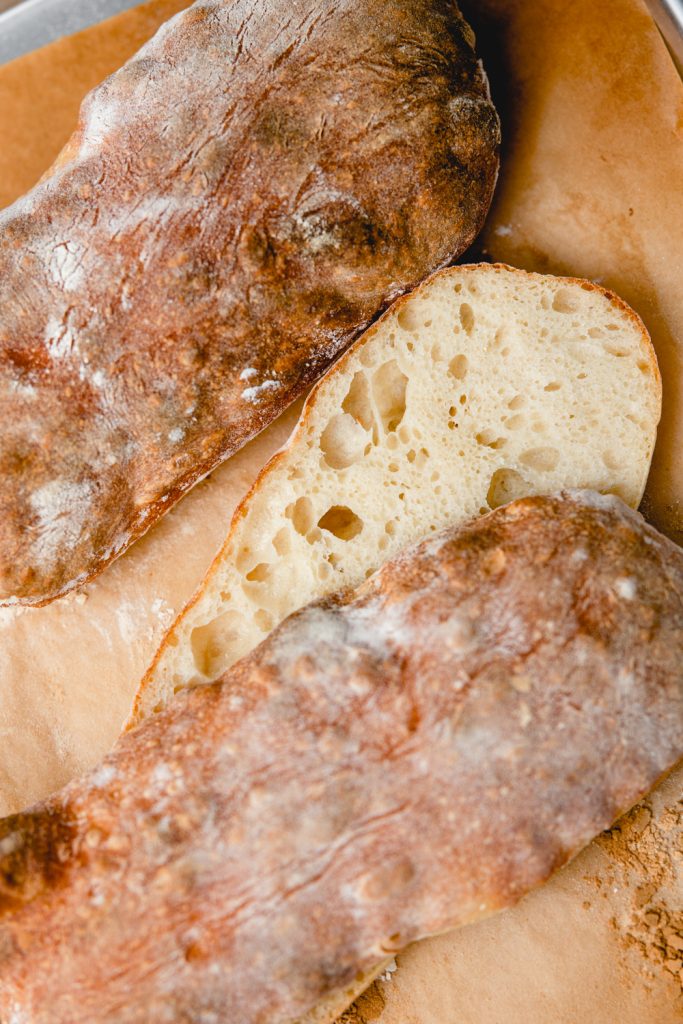
This ciabatta bread can be shaped into rolls or loaves, but either way it will be light and airy, chewy with crisp exterior.
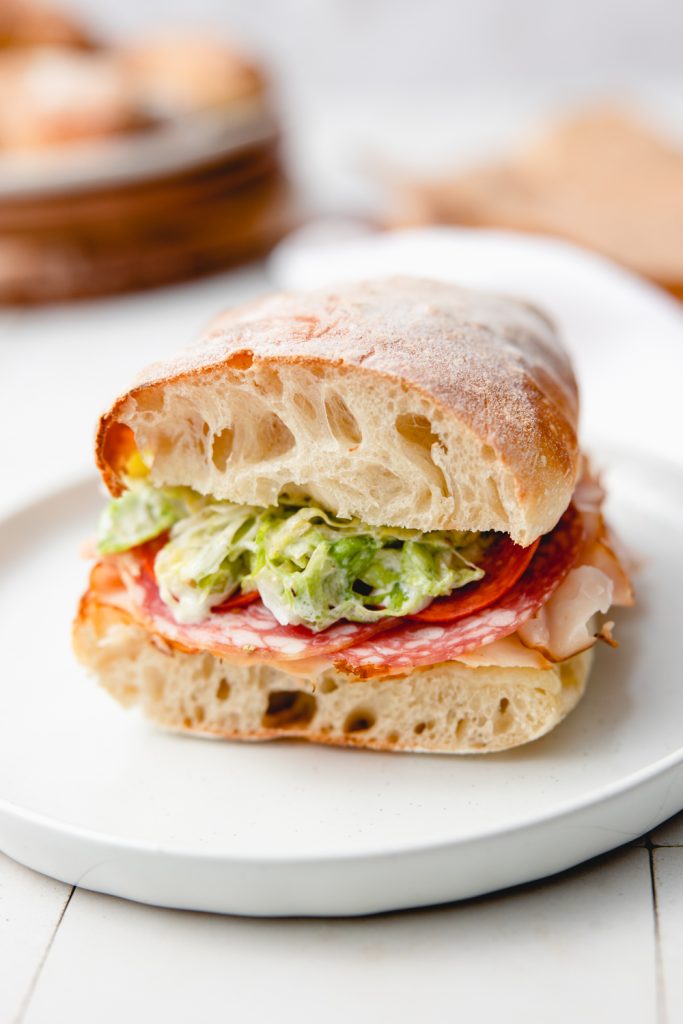
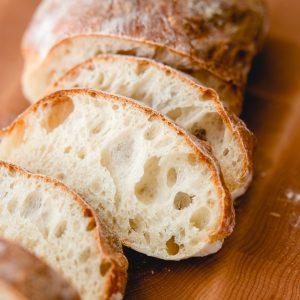
Ciabatta bread was perhaps the first bread I fell in love with. I loved its crusty exterior yet soft and holey interior. It’s excellent for sandwiches and toasting and letting butter get inside all those holes. I mean, look at this sandwich I made with this recipe:
However, making ciabatta bread can be much more finicky. Many recipes have long proofing times, some use a poolish or biga to start, and the dough isn’t always the easiest to work with. Most of the time, I just buy it from the store because it’s easier. But easier doesn’t always mean better. Homemade ciabatta bread just tastes so much better!
Generally, ciabatta bread is made from just four ingredients: flour, salt, yeast, and water. Mine has one additional ingredient (which can be left out if you are intolerant): milk. I learned from America’s Test Kitchen that adding a little milk helps weaken the gluten which makes the bubbles in the bread a little more uniform. This prevents GIANT bubbles next to small ones, which make bread harder to use in things like a sandwich. Milk also adds a little fat which helps with flavor.
Baking Tips & Notes
Ciabatta bread is a high hydration bread. My focaccia dough is around 91% and my bagel recipe is around 55% (which is pretty dry). High hydration doughs yield lots of bubbles which is great, however it can make them hard to handle. This ciabatta bread is at 80% hydration, so not as wet as focaccia but still pretty high. Because of this, we use both the stand mixer and stretch and folds to help develop the gluten and make the dough more workable.
Making sure your hands are wet and your work space and tools are floured is going to make a ton of difference. Wet hands prevent the dough from sticking to you without adding more flour to the dough. The floured workspace do the same, however flour patterns on the crust of ciabatta are a signature look so more is more on this one.
Additionally, because the dough is high hydration, shaping your dough takes a little bit of skill or practice. The first time you make these you will see, however not being afraid to use flour on your work space and a good bench scraper will help tremendously. As always though, practice makes perfect but irregularly shaped ciabatta will still TASTE just as good.
If you have a pizza or baking stone, instead of placing your parchment on a baking sheet I would just place your parchment on your counter and then when you’re ready to bake use a pizza peel or if you have a sheet pan without sides (or one flipped over) to transfer your parchment to the baking stone. This is completely optional, I have made this ciabatta bread several times just on a regular sheet tray and it was great. The baking stone will help create extra crust though.
This recipe is also not an overnight proofing recipe like many ciabatta bread recipes because I wanted to create one with a lower barrier to entry. This recipe could be turned into an overnight recipe though by refrigerating the dough after all the stretch and folds instead of letting it proof on the counter for an hour. Once it has proofed overnight I would then shape the dough, but your proofing before baking will most likely be much longer – depending on how warm your home is.
Ciabatta Bread Key Ingredients
- Bread Flour – I did test this recipe with AP flour as well, and it does work so you can use all purpose but I do recommend bread flour. My bread flour loaves were slightly more workable dough and the bread had a taller rise as well.
- Milk – Just a tiny bit of milk added to this dough will help weaken the gluten and help with the structure of the bread. Make sure it is warm though!
- Salt – Most of the flavor of this bread comes simply from salt. Use a good sea salt. If you are using kosher salt, go by the weight not the amount as different brands have different size and can be much more or less salty.
Ingredients
- 360 g Bread flour 3 cups
- 4 g Instant yeast ½ tbsp
- 10 g Sea salt ½ tbsp
- 260 g Water warm, 1 cup + 1 tbsp + 1 tsp
- 30 g Whole or 2% milk warm, 2 tbsp
Instructions
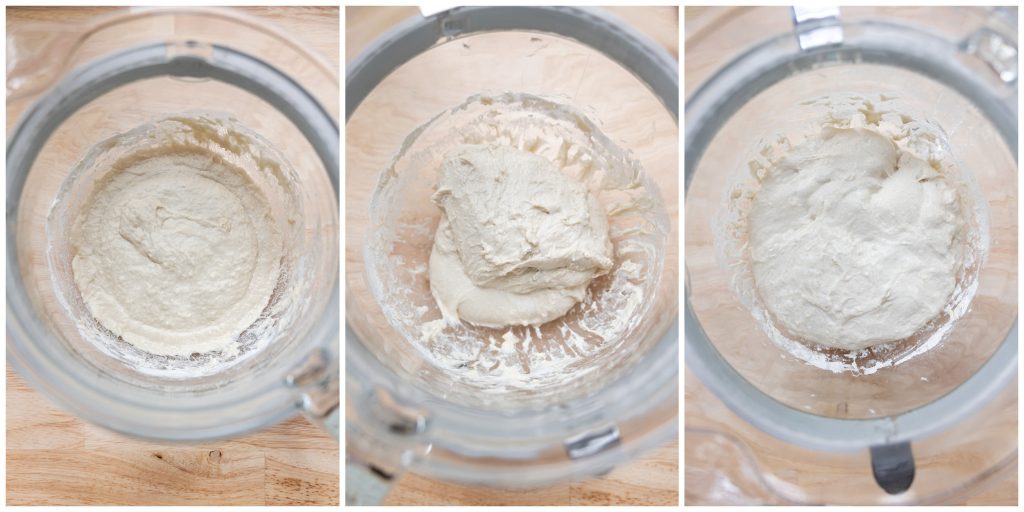
- In the bowl of your stand mixer, add all of your ingredients and mix on low-med for 10 minutes with the dough hook attached. I find it easiest to use the dough hook before attaching it to the machine to stir all the ingredients so they form a rough dough before attaching and letting the stand mixer mix.
- After 10 minutes, cover the bowl with a tea towel to rest for 20 minutes.
- Wet your hands, and perform stretch and folds. Tuck your wet fingers under the dough at the 12 o'clock position and pull the dough up towards you, then fold it over towards the 6 o'clock position. Turn the bowl a quarter turn and repeat 3 more times for a total of 4 stretch and folds. Cover the bowl.
- Repeat the stretch and folds two more times each 20 minutes for a total of 3 sets over one hour. After the third set, cover the bowl and allow the dough to proof for another hour.
- Line a baking sheet with parchment or a silicone mat and flour generously.
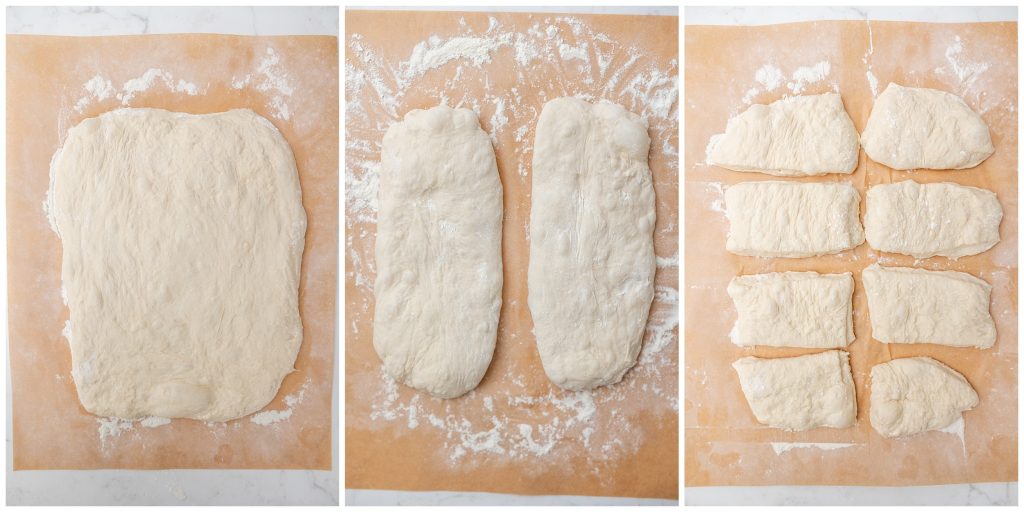
- Turn the dough out onto the floured baking sheet and pat out into an 8×10 inch rectangle. Lightly flour the top of the dough.
- Using a bench scraper, cut the dough lengthwise into two 4×10 inch rectangles.
- If you are making loaves, shape the loaves to give them space from each other. If you are making rolls, cut each rectangle into 4 rolls creating 8 ciabatta rolls.
- Lightly flour any sticky spots and cover with a clean tea towel or proofing cover for 30-60 minutes.
- While your dough proofs, preheat your oven to 450°F. If you have a baking stone, I would place this in the oven and bake your bread on the baking stone. If not, it is fine to bake on your baking sheet.
- Optional: Place a cast iron pan in the bottom rack of your oven while it preheats. As the rolls go in the oven pour a handful of ice cubes into the cast iron to create steam. This will help the exterior of your rolls to be extra crusty.
- Lightly mist your rolls with water from a spray bottle before they go into the oven.
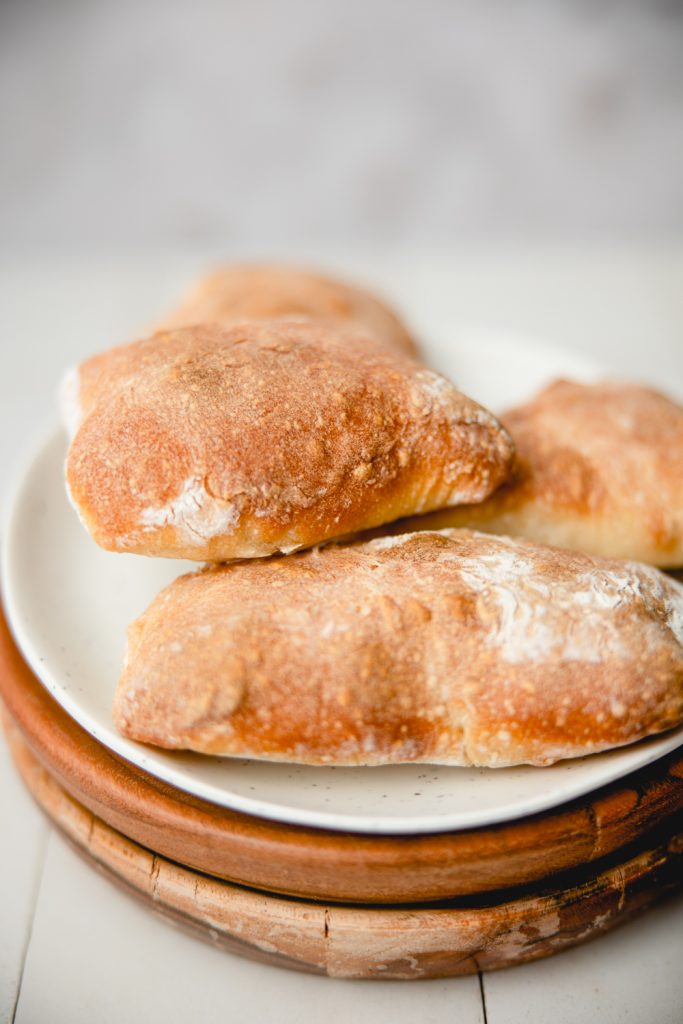
- Bake your rolls on the center rack of your oven for 18-20 minutes until golden brown.
- Remove from the oven and transfer to a wire baking rack for cooling. Ciabatta will keep fresh in an airtight container for 2-3 days. Enjoy!