
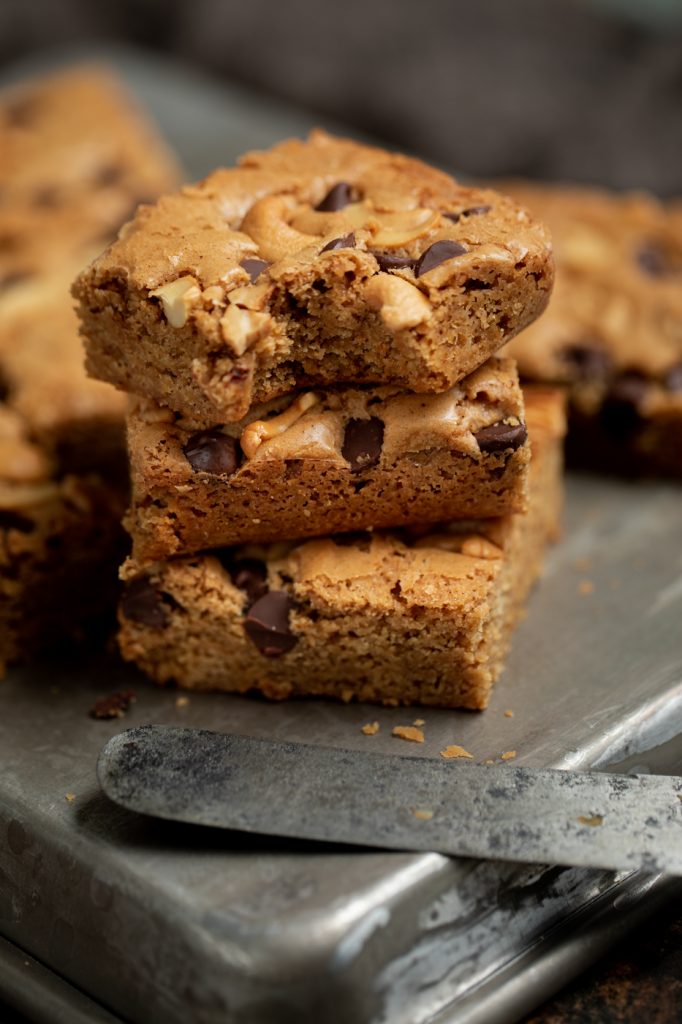
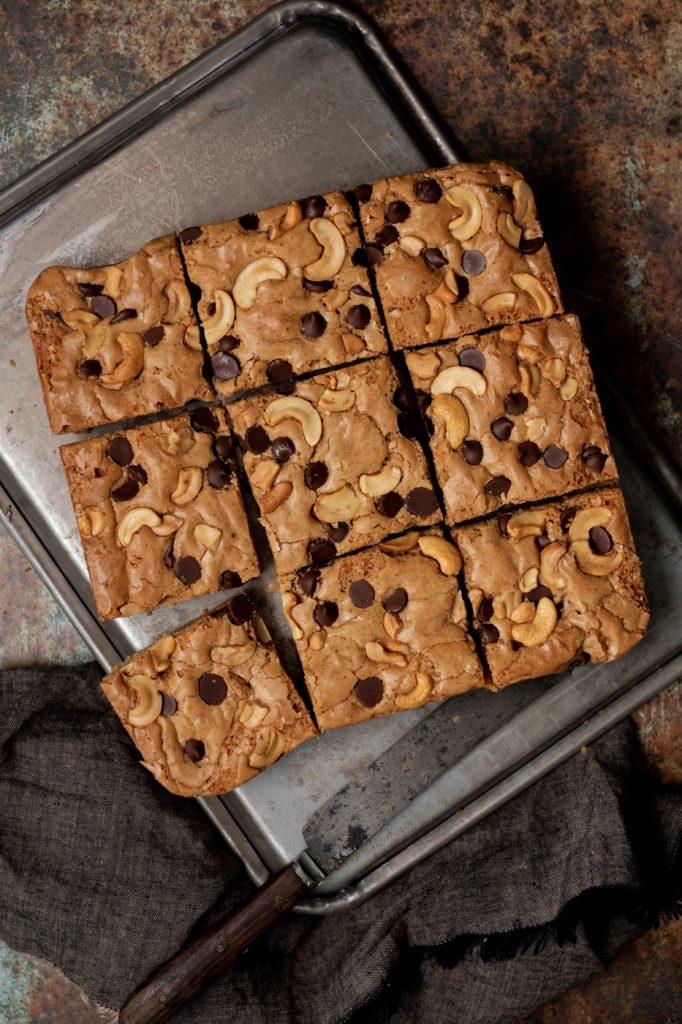
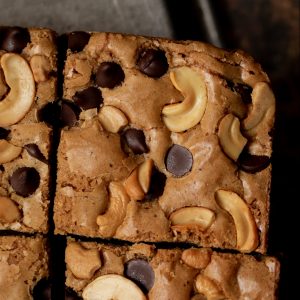
Nut Butter Blondies
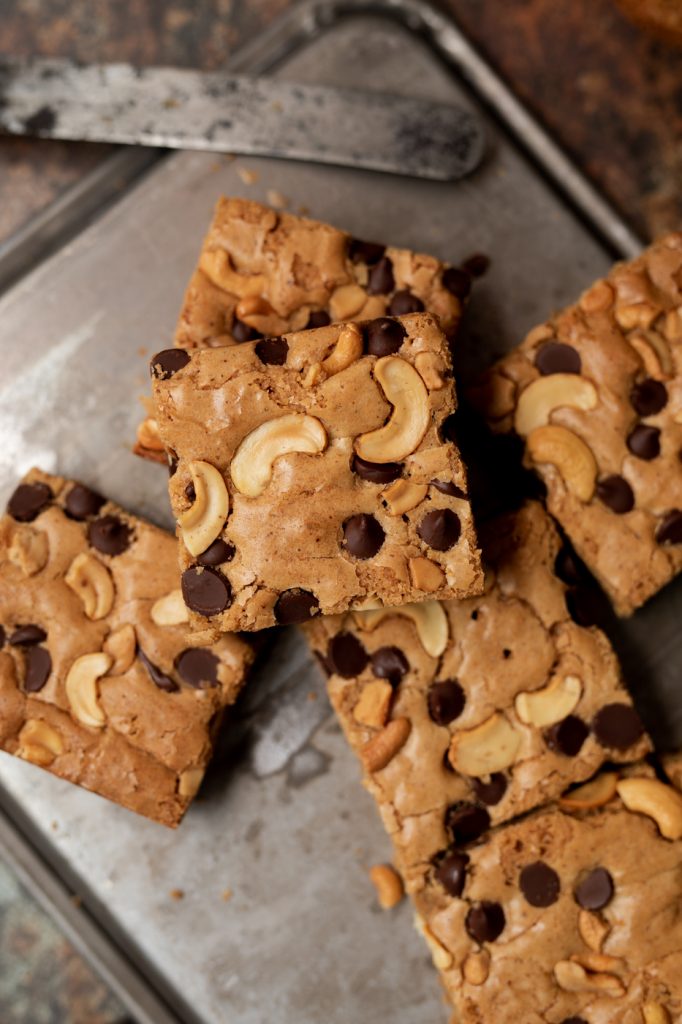
I wasn’t sure what to call these nut butter blondies because they are a combination of brown butter, cashew butter, and then topped with cashews and chocolate chips. Brown butter blondies? Cashew butter blondies? Neither would really explain the taste accurately. And let me tell you, they are sooo good. Like most bar type desserts, it’s a pretty simple and quick bake. You can be done in about an hour start to finish!
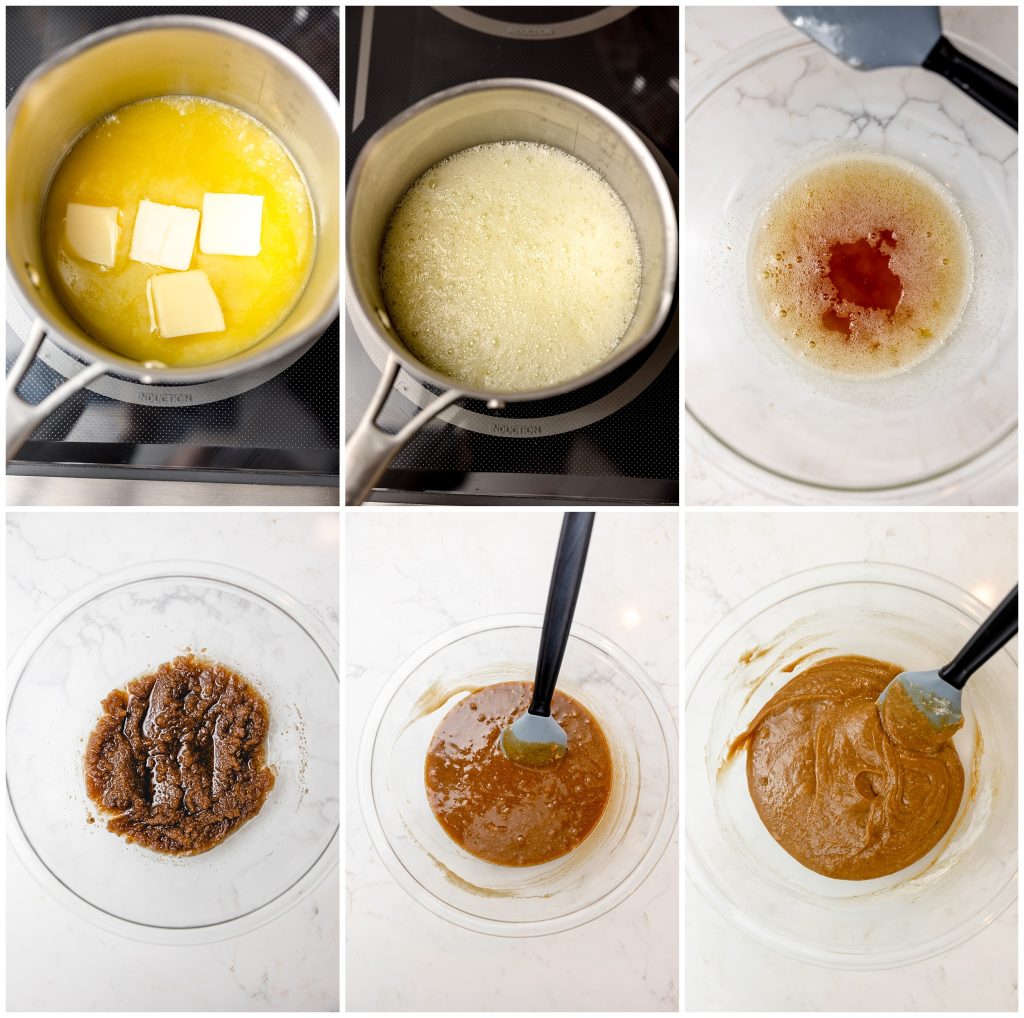
If you’ve never browned butter before, I think it will be the most difficult step in the recipe. And really it’s not hard, it just requires you to not walk away from the stove for about five minutes. You will add butter to a light colored or stainless bottomed pan, melt it and toast the milk fats. Paying attention is crucial as butter goes from perfect level browned to burnt in less than 30 seconds.
Baking Notes & Tips
The chocolate in these nut butter blondies is optional, but delicious. You can stir the chocolate chips – or chopped chocolate if you prefer – into the batter or just use it as a topping with the cashews. I use semi sweet chocolate, however dark or milk or even white chocolate could be substituted.
For your cashew topping I used salted to add a little salt to cut the sweetness. If you use unsalted, I’d probably increase the salt in the blondies by about another 1/4 tsp, or add flaky sea salt to the top .
I also adapted these blondies into my Oreo Blondies and my Rainbow Malted Milk Blondies. Both taste quite different as we have dropped the cashew butter in lieu of other ingredients but all equally delicious!
Nut Butter Blondies Key Ingredients
- Brown Butter – Brown butter adds a ton of flavor to these nut butter blondies. It amplifies the natural taste of butter but also adds a caramel nutty flavor that can’t be replicated.
- Cashew Butter – Cashew butter is like peanut butter but smoother. The taste is more subtle so it won’t overpower the other flavors. You could substitute peanut, pistachio, or almond butter but if you can I’d recommend cashew. Cashew butter is pretty similar to traditional peanut butter in texture. If you use something like almond butter that can be much more loose/liquidy, you might need to add a few tablespoons of additional flour to compensate for that.
- Chocolate chips – Who doesn’t want to add a little chocolate to something. I use semi sweet but you could swap in dark or milk chocolate.
Ingredients
- 113 g Unsalted butter ½ cup
- 150 g Dark brown sugar ~¾ cup, packed
- 50 g Granulated sugar ~¼ cup
- 2 large Eggs room temperature
- 1 tsp Vanilla extract
- 100 g Cashew butter ~6 tbsp
- 100 g AP Flour ¾ cup
- ¾ tsp Salt
- ¾ tsp Baking powder
- ⅓ cup Chocolate chips
- ¼ cup Cashew halves and pieces
Instructions
- Preheat oven to 350°F and line an 8×8 pan with parchment.
- Brown your butter. Take your butter and put it in a light colored or stainless pot or pan on medium heat. Butter can be cold, but I find this process smoother if the butter is room temperature. Stir the butter as it melts. Butter will bubble then foam, and once the fats start to turn a golden brown and smell nutty, remove from heat and pour butter into a bowl to cool off. Butter goes from browned to burnt quite quickly so don't leave your butter unattended!113 g Unsalted butter
- Add both kinds of sugar to your butter and mix until combined. You can use a mixer but hand mixing works great.150 g Dark brown sugar | 50 g Granulated sugar
- Once combined, add in eggs and mix until thoroughly combined.2 large Eggs
- Add in vanilla extract, mix in, and then add in cashew butter and mix until smooth.1 tsp Vanilla extract | 100 g Cashew butter
- In a separate bowl, whisk together flour, salt and baking powder.100 g AP Flour | ¾ tsp Salt | ¾ tsp Baking powder
- Add dry ingredients into wet and stir in with a spatula until flour is JUST combined.
- Chocolate chips can either be stirred in here or just used on the top (or a combination of the two – completely personal preference.⅓ cup Chocolate chips
- Add your batter and add cashews and any remaining chocolate chips to the top.¼ cup Cashew halves and pieces
- Bake on the center rack for about 30-35 minutes. A toothpick inserted should come out cleanly. Let cool in pan for at least 3 hours before cutting into them.
- Cut and serve after completely cooled. Store in an airtight container for up to 3-5 days. Enjoy!


3 Comments