
Easy No-Knead Cranberry Walnut Bread
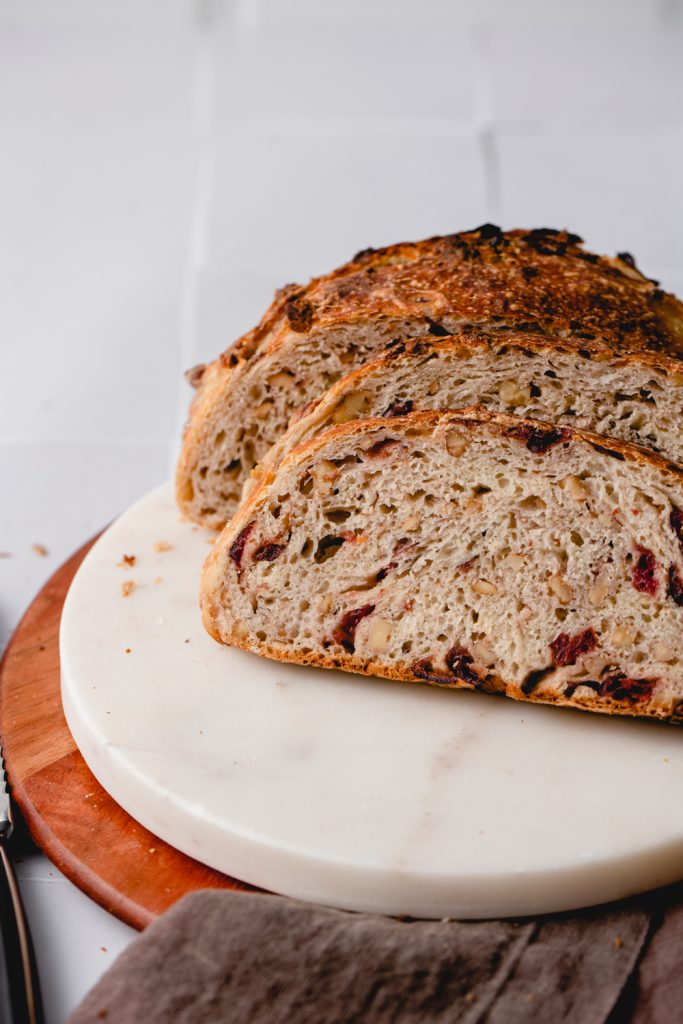
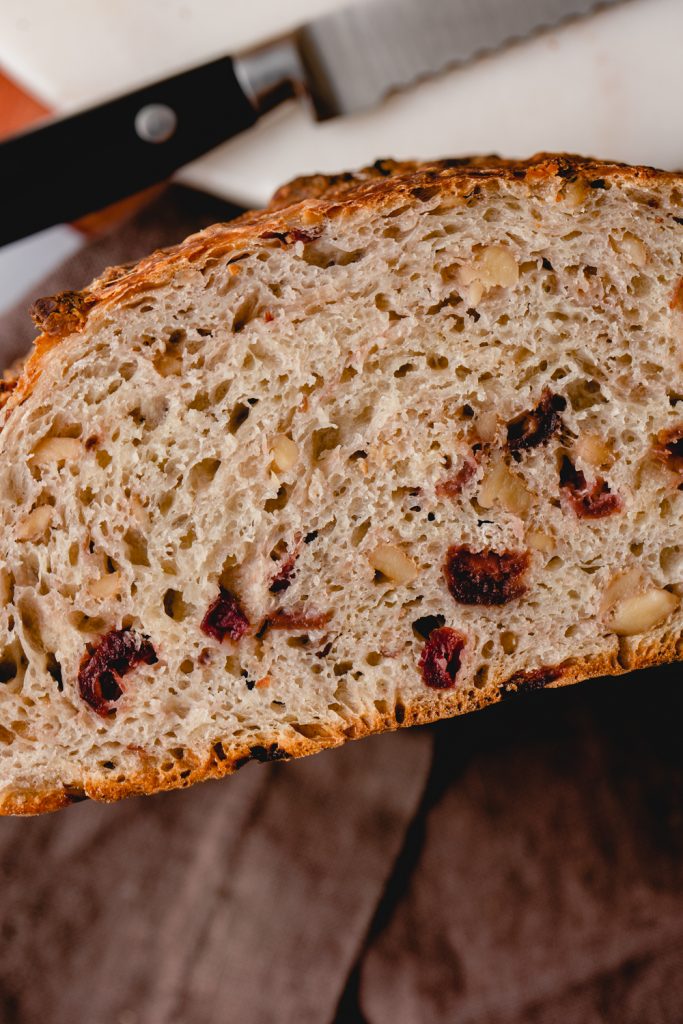
This no-knead cranberry walnut bread has a crisp exterior, with a soft crumb studded with chopped walnuts and cranberries. I love a good no-knead loaf. They are shockingly easy, they just require time in order to get the best flavor. You CAN make them in a few hours, but I promise you that waiting overnight will lead to superior taste. Your taste buds will thank you. It’s perfect anytime but especially now around the holidays.
Cranberry seems to be kind of divisive topic around thanksgiving. Some people love it, some people hate it, should it be canned or fresh. Should it be in the green beans or stuffing etc. I don’t know. I was always kind of meh about them in general. I didn’t grow up eating cranberry anything, and I was kind of picky when it came to turkey day food. But, a good cranberry dish can change your mind. My cranberry star bread is so lovely, I wanted to put the flavor in more baked goods. And obviously bread is best in my book.
If you’ve never made a no-knead bread, it is exactly that. Usually, kneading is what develops the gluten structure in your bread. It will give you that lovely crumb with pockets of air and soft texture. It’s the difference between a quick bread like banana bread and dinner roll. If you don’t sufficiently knead your bread dough, it can become very dense.
Now, how can a bread achieve a nice crumb without kneading? Time. When you knead you are rubbing the proteins together, encouraging them to form a network. When you don’t knead, and let time do the work, the liquids are breaking down the protein bonds and bubbles of carbon dioxide are gently moving the dough to create that gluten network. It’s very science-y but trust me, it works.
You WILL need a dutch oven (or some sort of cast iron covered baker) for this no-knead cranberry walnut bread. The dutch oven will create steam while the bread bakes inside it and lead to a crispy exterior with that soft crumb. You can also try my White-Wheat Dutch Oven Bread for another easy dutch oven bread recipe. No-knead is a great option for when you begin bread baking.
No-Knead Cranberry Walnut Bread Key Ingredients
- Dried Cranberries – Like raisins, we want the dried form of cranberry but we are going to rehydrate them a little before baking. This allows them to not leech liquid from the dough OR become even more dried and hard. I used water in this recipe but you could also use cranberry juice or apple juice when you soak them for a little more sweetness and flavor.
- Chopped walnuts – Personally, I like the walnuts chopped a little on the smaller side for this recipe. Then you aren’t getting any huge pieces of nut in the final bread, but it’s very much up to your preference.
- All purpose flour – While many breads, bread flour is better. I thought this one turned out slightly better with all purpose. It can definitely be made with either though.

Ingredients
- 360 g AP flour 3 cups
- ½ tsp Instant yeast
- 1 tsp Sea salt
- 1 tbsp Dark brown sugar
- 295 g Warm water 1¼ cup
- 80 g Dried cranberries ½ cup
- 56 g Chopped walnuts ½ cup
Instructions
- In a small bowl, add cranberries and 1 cup hot water (this water is separate from the water in the recipe). Let the cranberries soak for about 15 minutes to help hydrate them. After the 15 minutes has passed, dump the water out, and transfer your cranberries to a towel or paper towel and dry them off. They don't need to be bone dry, but just soaking up excess water on the surface.
- In a large bowl, combine flour, salt, yeast, sugar, walnuts and cranberries and mix all the ingredients.
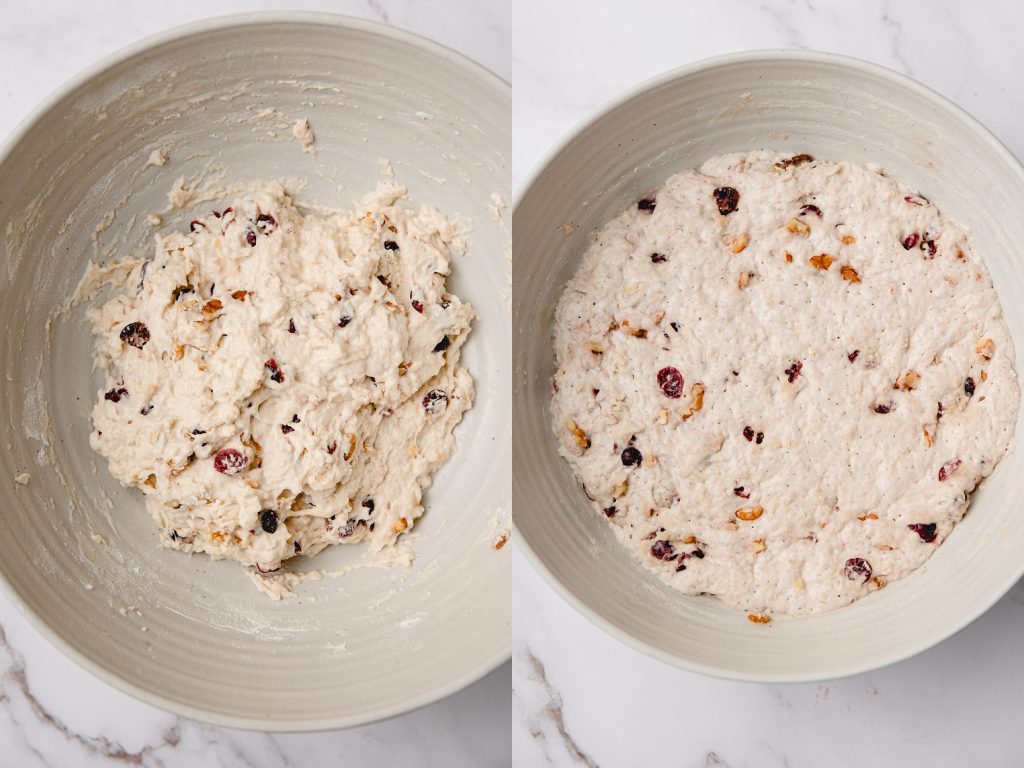
- Pour in your warm water and mix your dough together until it forms a wet loose dough.
- Cover your bowl and let it sit on your counter for 12-18 hours. Your dough doesn't need to be in a particularly warm spot but it shouldn't be anywhere cold. The dough will have risen to approximately double it's size when it's ready.
- When your dough has proofed for at least 12 hours, place a piece of parchment on your counter and lightly flour it.
- Fold in the sides of your dough from the bowl, shaping it into a ball and transfer to the center of the floured parchment with the side that was up when you created the ball is now facing down towards the counter.
- Take your bowl the dough proofed in, and place it upside down over the dough to proof.
- Place your dutch oven with lid onto the center rack of your oven and preheat to 450°F. Let your dutch oven stay in the oven for about 30 minutes at 450°F to get nice and hot.
- Carefully remove your dutch oven and take the lid off. Uncover your dough, pick up your parchment and dough and place them into the hot dutch oven. Cover with the lid, and place in the oven to bake for about 25 minutes.
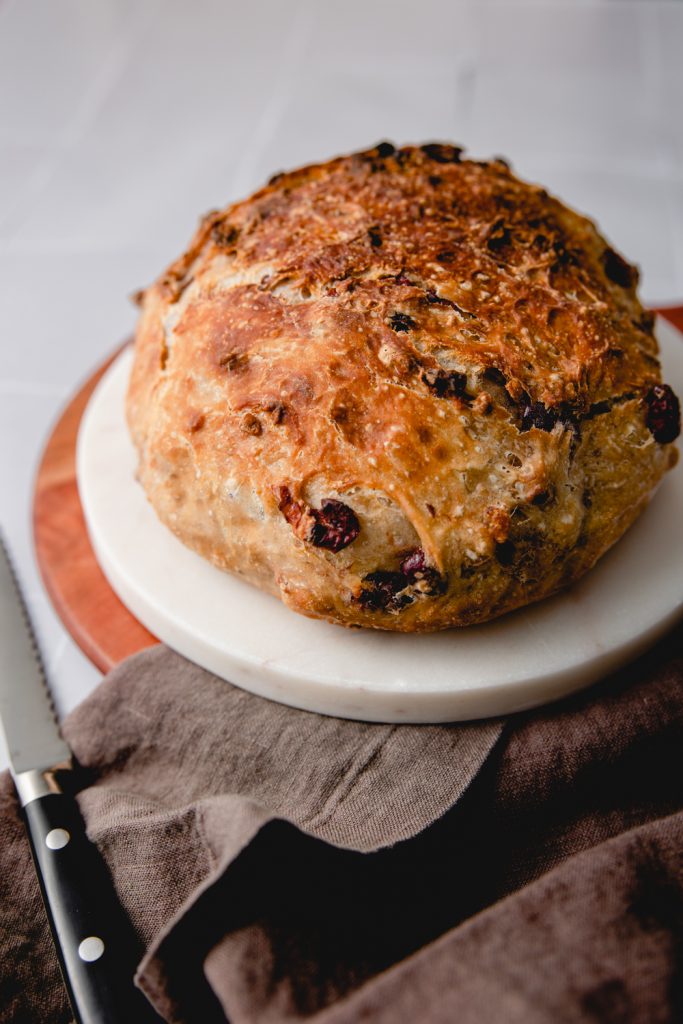
- At 25 minutes, remove the lid from your dutch oven and bake your bread for another 10-15 minutes. Bread is ready when its a deep golden brown.
- Remove dutch oven from oven, and carefully lift parchment and bread out and onto a wire cooling rack.
- Let bread cool completely to room temperature before slicing. Store in an airtight container for 2-3 days. Enjoy!


One Comment